The Caldeirão Verde hike is one of Madeira’s most famous levada walks, and after doing it, I’d say it’s easily one of the most impressive ones on the island. It follows the narrow water channel through some beautiful sections of laurisilva forest and along some impressively steep mountain cliffs.
The levada itself dates to the late 19th century and was built to transport water from the mountains to agricultural areas near the coast. Like many of these channels, it’s accompanied by a narrow maintenance path, which today makes for a super scenic hiking trail.
These trails turned out to be a great way to explore parts of the laurel forest and the mountains that would otherwise be inaccessible. Here’s everything you need to know about the PR 9 hike.

This post may contain affiliate links, and I might earn a small commission at no additional cost to you. For more info, click here.


Guided Hikes of the PR 9
We did this one on our own, but there are plenty of guided hikes available if you prefer going with someone who can explain a bit more about the landscape and history along the way. It’s also useful if you don’t have your own car to get to the trailhead, as there are no buses going there.
You can have a look below at some options.
A Description of the Trail
The trail starts at the pretty Casas das Queimadas in the mountains above Santana. The old thatch-roofed forestry houses were built in the early 20th century and with their half-timbered walls almost reminded us of historic houses in our native Germany.
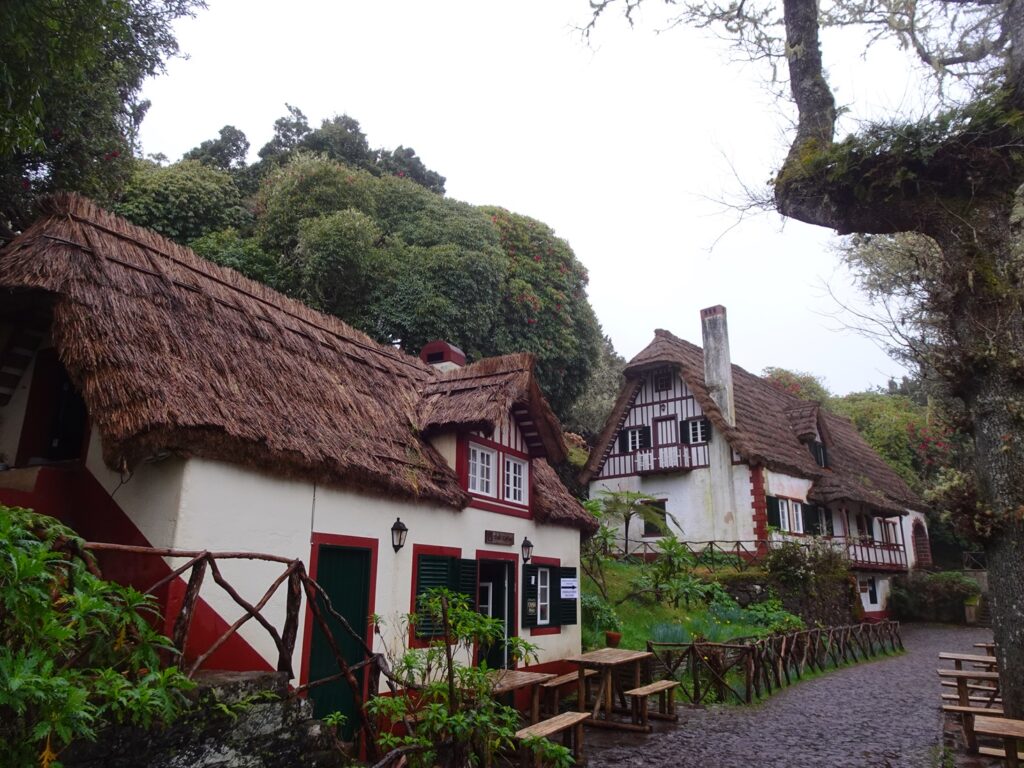
The bigger of the two buildings houses a small ethnographic museum (which was unfortunately closed when we were there) and a visitor centre for the Queimadas Forest Park, through which the trail runs. The smaller building is home to a tiny café, which is a nice place for a drink and a piece of cake after the hike.
The PR 9 trail begins north of the houses next to the small duckpond, where it joins the water channel and stays alongside it for most of the hike. This is the only levada on the island where we regularly spotted trout in the water (we saw them in others, too, just not that frequently), so have a look once in a while.
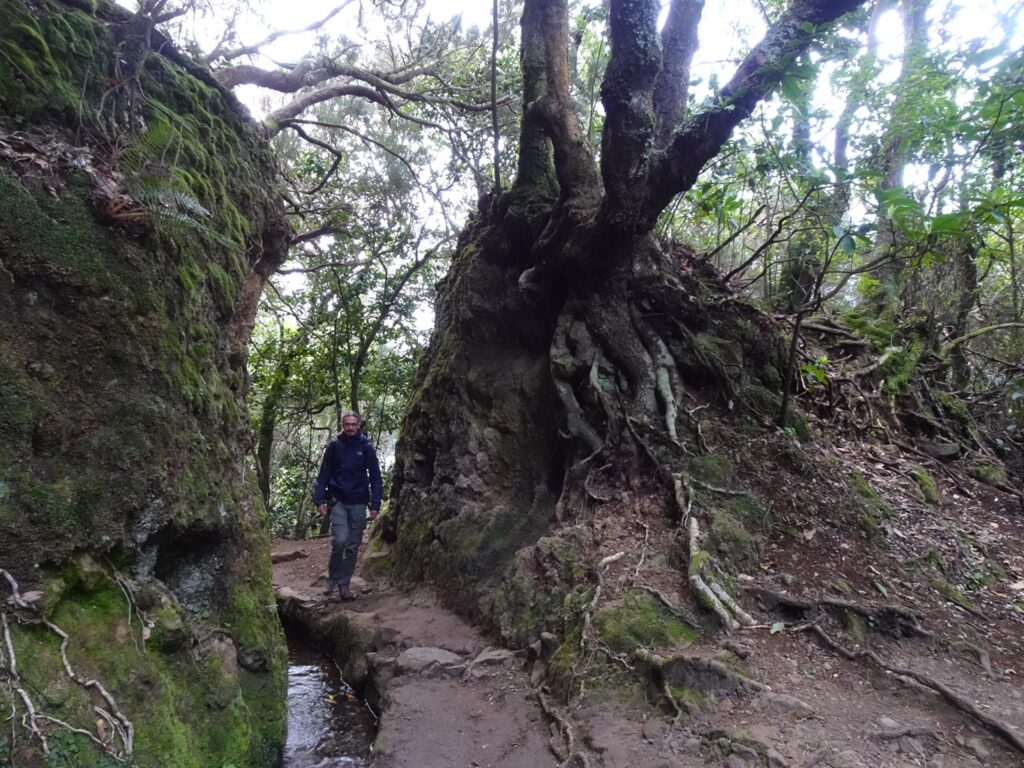
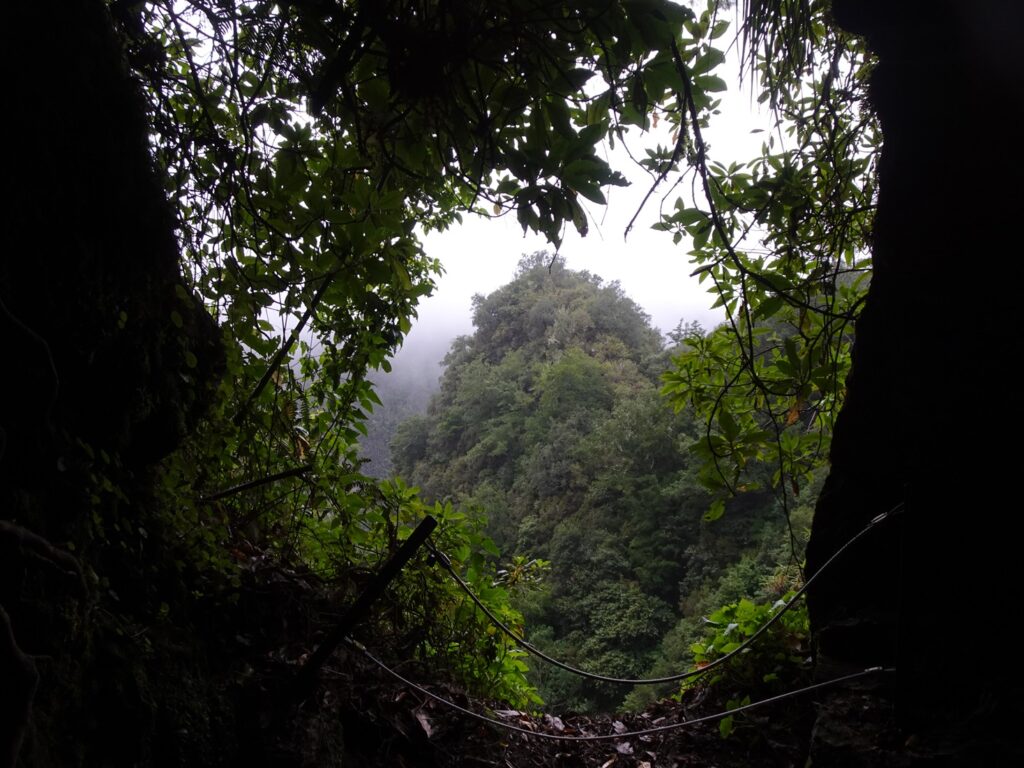
Right away, the trail leads through a pretty section of moss-covered laurisilva forest, a type of subtropical evergreen forest that only remains in a few places in the world. The path itself is still quite broad here, but it gets increasingly narrower the farther you go.
After a while, the path starts zig-zagging its way around a couple of small valleys, at the heads of which the trail and levada cross little rivers on bridges or dams (first the Ribeira dos Cedros and later the Ribeira da Fonte do Louro). At the second one, there is a decently sized waterfall running off the cliff next to the trail.
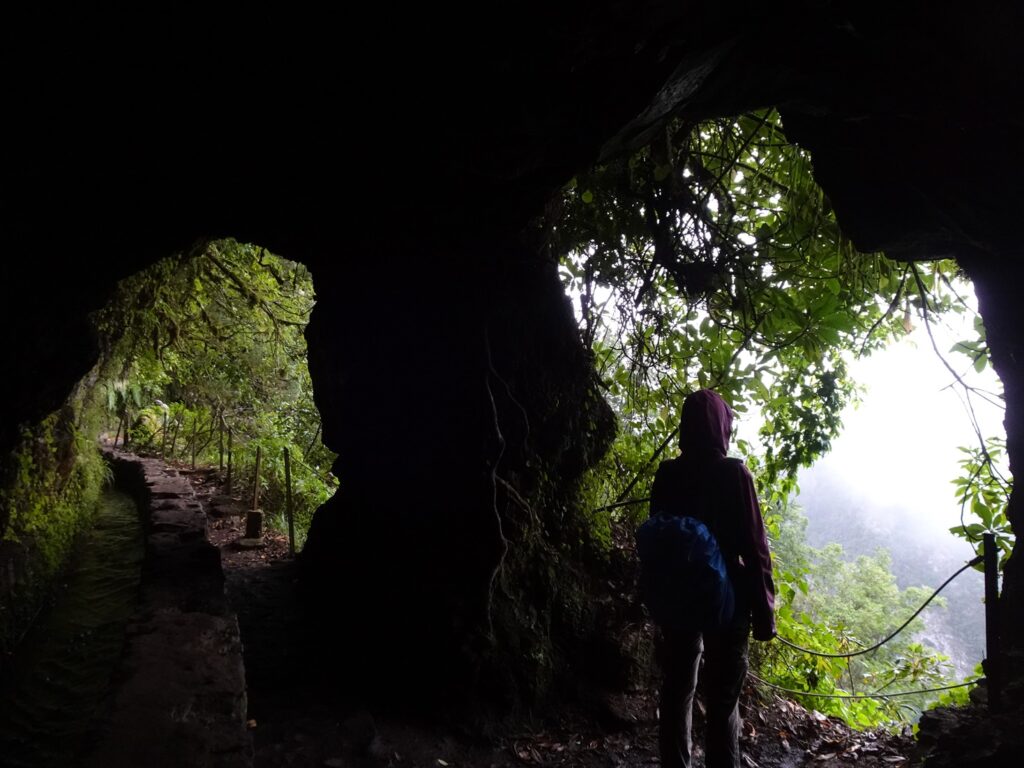
Eventually, the trail straightens out and runs through a series of tunnels carved into the rock of the mountain. Two of them are rather short, but the one in the middle runs on for about 200m or 650ft.
The trail inside was quite muddy when we did it and occasionally, it was easier to walk atop the levada wall instead. At other points, you’ll have to step down, as the tunnel roofs become quite low. In any case, you’ll definitely need a torch, as the tunnels are long enough to be pitch-black in the centre.
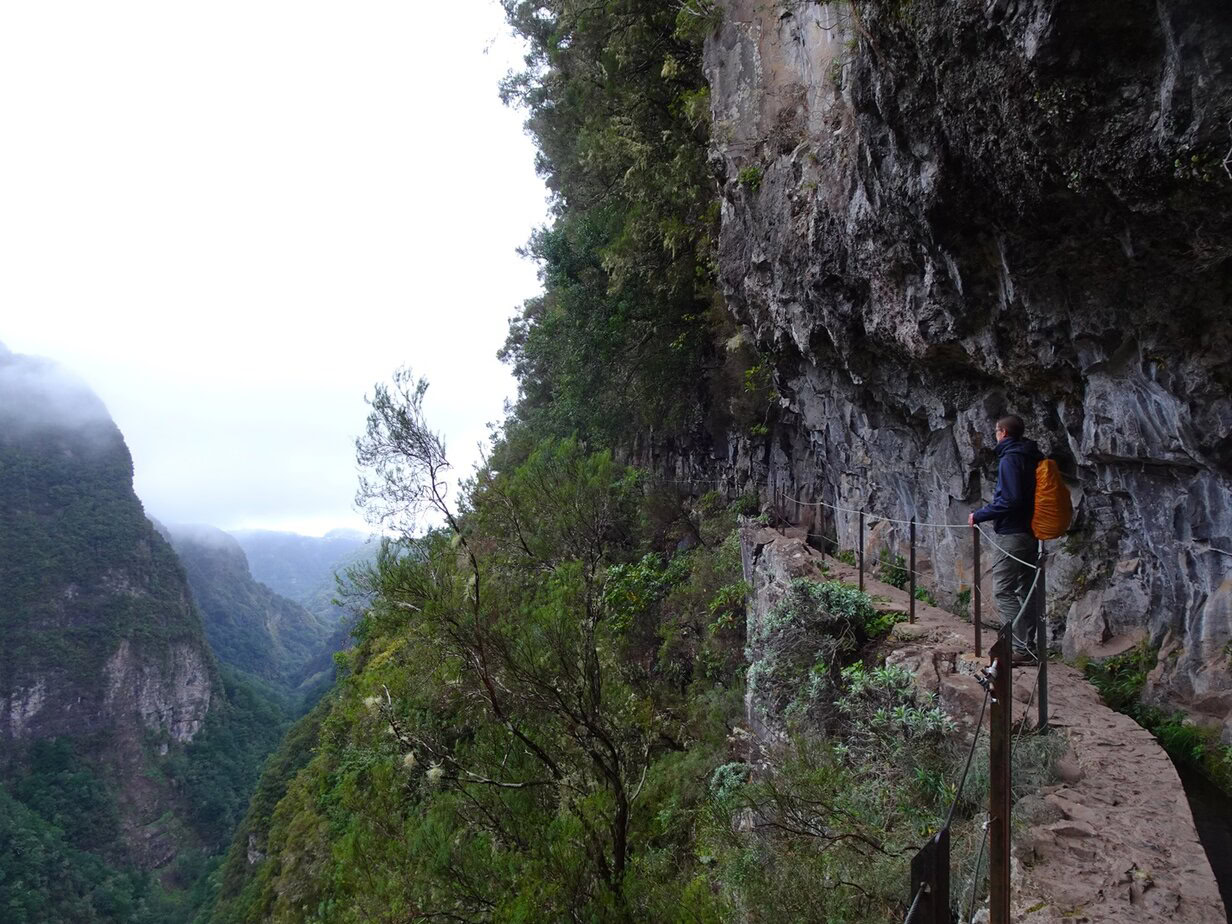
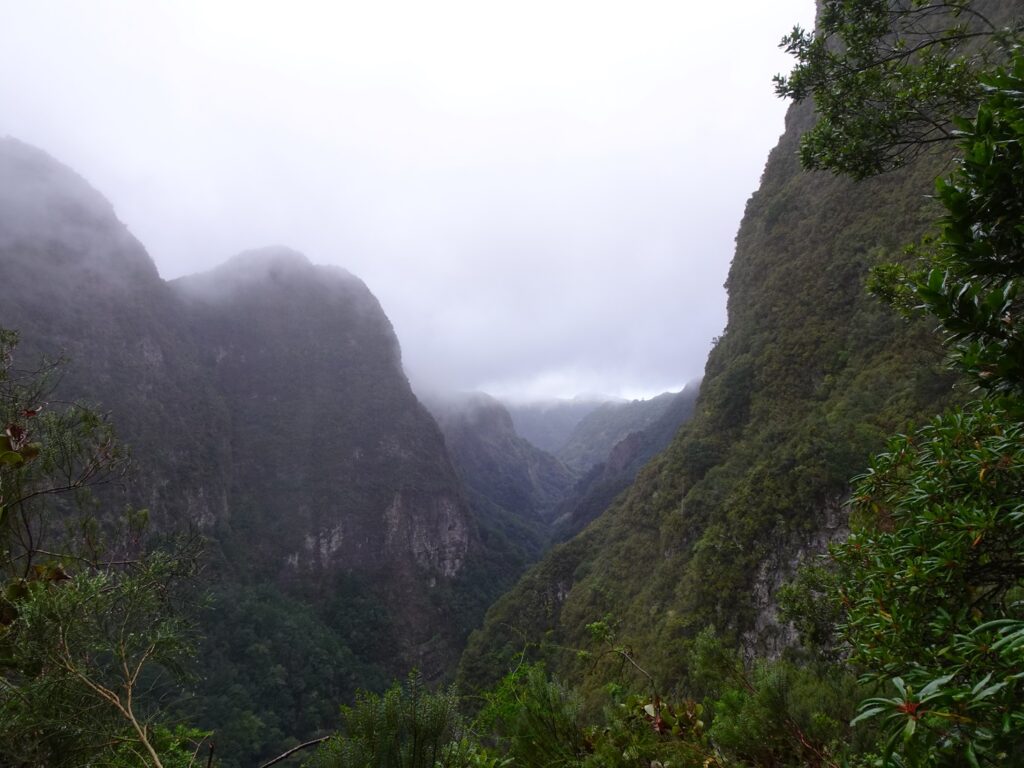
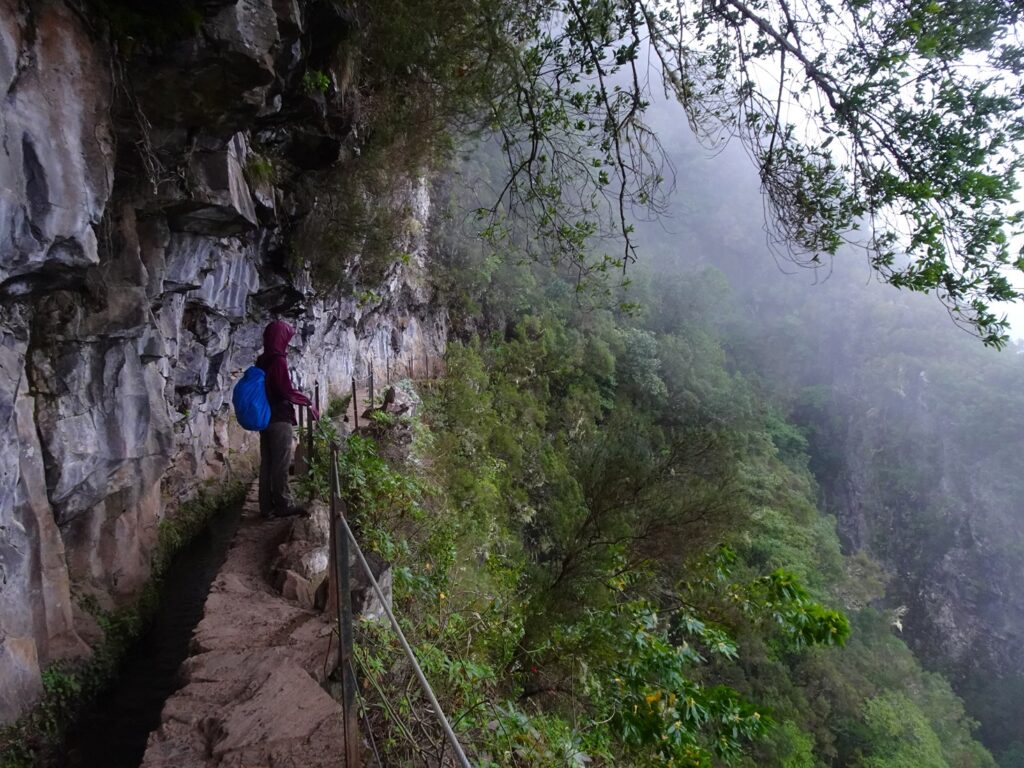
As you get closer to the end of the trail, the scenery starts becoming ever more dramatic. There’s one stretch where the path is carved directly into the cliff high above the Ribeira dos Arcos Valley, which was our favourite part of the entire trail.
Here, you’ve got the sheer cliff wall on one side and a steep drop of several hundred meters on the other. There are railings along this entire stretch, but if you’ve got issues with height, this part might still be uncomfortable for you.
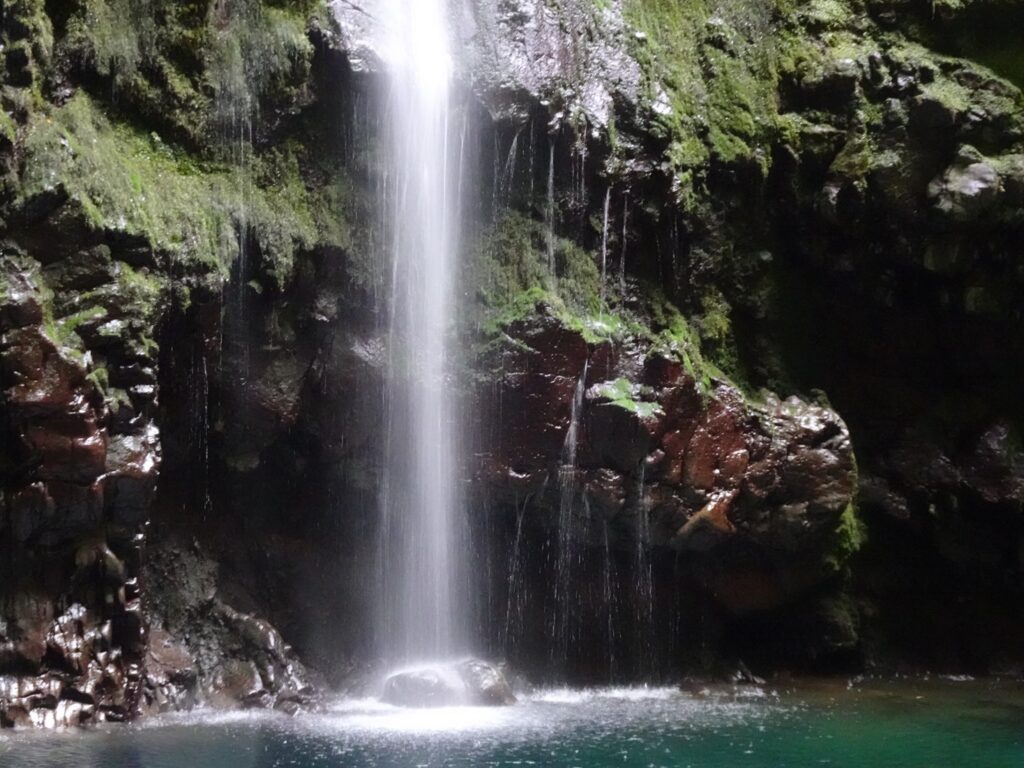
That said, the views over the mountains surrounding the valley were absolutely amazing and you can already get your first glimpse of the waterfall at the end of the trail from here. After maybe 15 more minutes, you’ll arrive in a small enclosed valley, which is the Caldeirão Verde that the trail is named after.
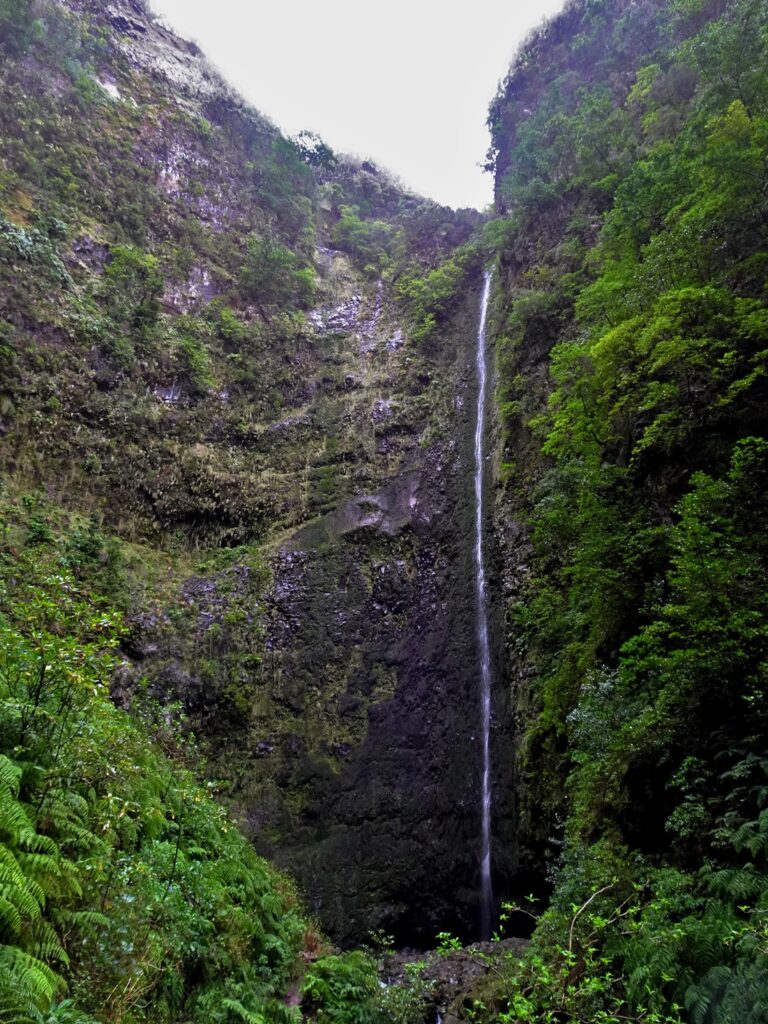
The name translates to “green cauldron”, which we thought was very fitting. The space is surrounded by steep vertical cliffs, with a tall waterfall dropping down into a shallow pool at the bottom.
We had read somewhere that the cascade is supposed to be around 100 metres tall, but our guess was more like 50 or 60 metres. In any case, it’s very impressive and as we started so early and were the first ones there, it also felt very peaceful.
From here, you can simply return the way you came, which is what we did. Technically, there’s also a trail connecting to the Caldeirão do Inferno further west, but it was closed for maintenance when we were there and honestly it didn’t look like it would reopen soon.
Map of the Caldeirão Verde Hike
This map shows the route of the hike from Casas das Queimadas to the Caldeirão Verde waterfall.
Practicalities
Getting There by Car and Where to Park
The trailhead is at Casas das Queimadas, which you can reach by driving up into the mountains past the Parque Temático at the southern end of Santana. The road, which is just called Caminho das Queimadas, is quite narrow and when we left around noon, there were lots of cars coming up the mountain, so it’s best to take it slow.
There’s a parking area near the start of the trail. When we arrived early in the morning, there was just one other car, but when we left around noon, it was almost full. The parking fee is 2€ per hour and you’ll have to pay afterwards by scanning your ticket at the machine in the lower level of the bigger Casa das Queimadas (where the visitor centre is).
How to Get to the Trailhead Without a Car
Unfortunately, there are no buses going to the Casas das Queimadas. The easiest way without a rental car would be to take a bus to Santana, and to get a taxi from there to the Casas das Queimadas. Obviously, you’d need to agree on a pick-up time for the way back.
Alternatively, you could walk there from Santana in about an hour, but it would be quite an uphill slog and you’d need to start even earlier if you want to beat the crowds. Finally, you could hike the trail with a guided tour, as they usually also include transport to the trailhead (see the ‘guided hikes’ section above).
Entrance Fee & Booking
Like many of Madeira’s official hiking trails, this one now requires a permit. The fee is €4.50 per person, and you need to book a time slot online in advance through the official Madeira hiking portal.
Distance and Elevation Gain
The full hike (there and back) is about 12km or 7.5 miles. The elevation gain is minimal, as you’re mostly following the levada, so it’s one of the easier longer hikes on the island.
The tunnels can get a bit muddy and the final 50 metres or so to the waterfall require some walking over slippery rocks, but in general I’d say it’s a very easy hike.
How Long Does It Take?
It took us around 3.5 to 4 hours in total, including some time at the waterfall at the end and a few shorter stops along the way. That said, the fuller it gets, the longer it will likely take. We were slower on the way back, when lots of people came our way on the sometimes narrow trail.
Places to Eat Along the Way
The only place to get some food is at the Casas das Queimadas near the trailhead, where there’s a small café. They have a lot of seats outside, but the room inside is tiny and has only room for maybe five or six people.
It started raining pretty heavily when we returned from the hike, and there were no umbrellas or anything set up outside. We were lucky that we were the first ones inside the café, but it filled up quickly, so don’t plan on getting a spot if the weather is bad.
Toilets
The only toilets are at the trailhead near the parking lot, where you’ll have to pay 50 cents. There are no facilities along the trail itself or at the Caldeirão Verde waterfall.
When to Go and How to Avoid the Crowds
This is one of the busiest hikes on Madeira, and because the trail is quite narrow, it can get quite exhausting when it is crowded.
I’d recommend starting as early as possible. We set off at dawn and had the way there plus the waterfall at the end completely to ourselves. On the way back, we passed a steady stream of people heading in, which meant that we constantly had to find a spot to let them squeeze by, so the way back took a lot longer for us.
Late afternoon could also work, but you’ll want to make sure you have enough daylight left to make it there and back before it gets dark.
What to Take
Some kind of torch is pretty much essential because of the tunnels, as some of them are completely dark inside. We took headlamps, as it’s useful to have your hands free to hold on to the walls along the way, but a phone flashlight would also be possible.
Otherwise, bring enough water and some snacks, and definitely also a rain jacket, as the weather can change very quickly on Madeira. There were only a few clouds when we started, a sudden heavy downpour on the way back and then bright sunshine 20 minutes later.